Thinking about making your website more engaging and user-friendly? A live chat widget is exactly what you need. Imagine visitors getting instant answers to their questions, boosting their satisfaction, and converting them into loyal leads. Let's dive in!
TABLE OF CONTENTS
Create Live Chat Widget
First things first! Creating a live chat widget is easy and straightforward. Here's how you can quickly set up and customize your widget to perfectly match your website's style:
- Navigate to Sites > Chat Widget
- Click New where you can choose one of the following: All-in-one chat, SMS / Email chat, Live chat, WhatsApp.
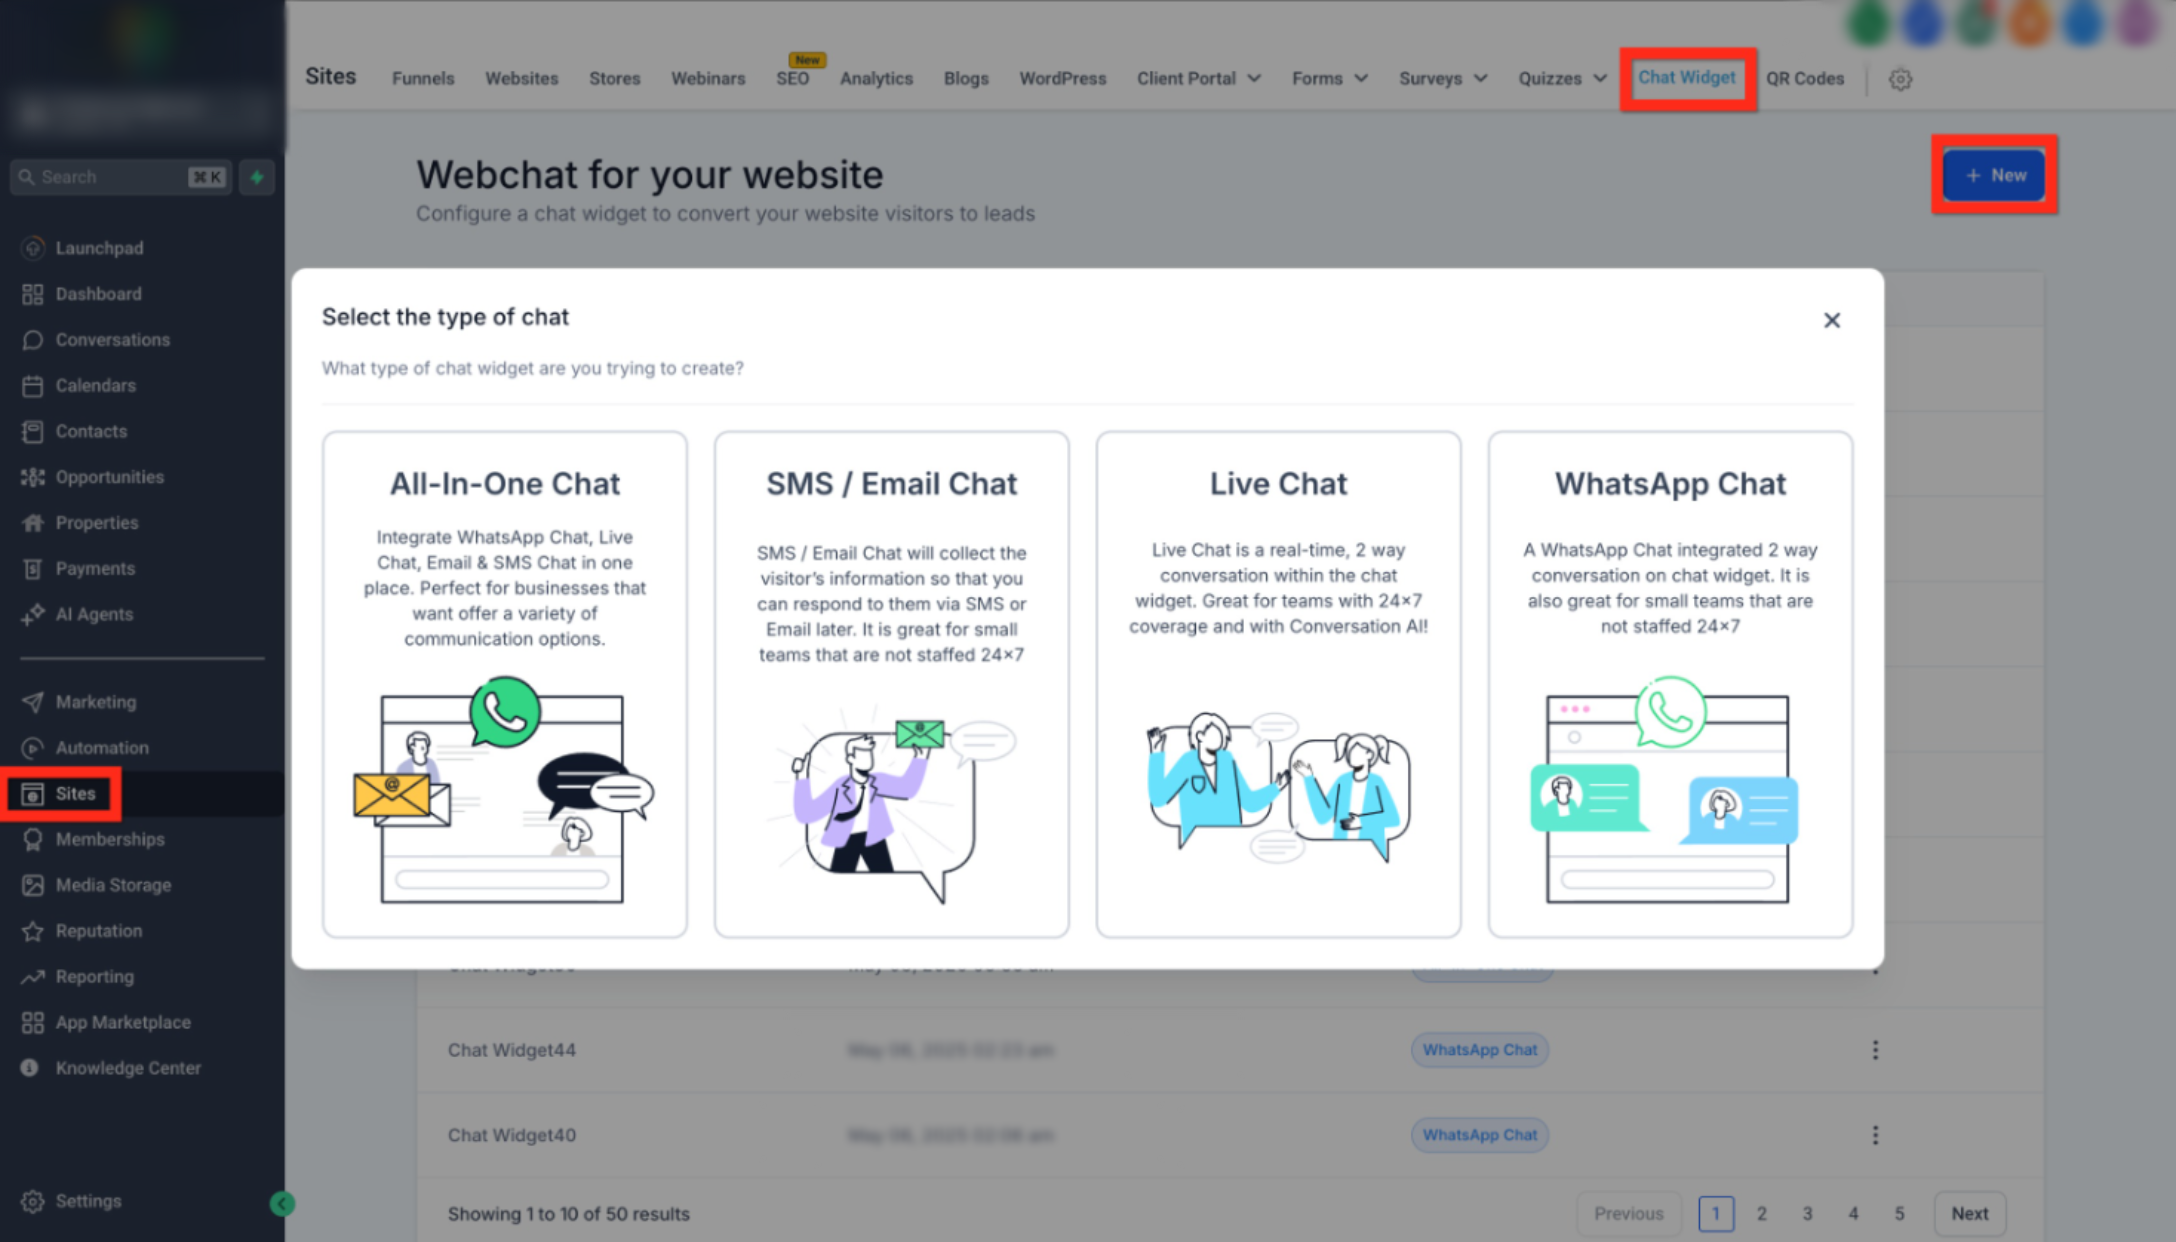
- Select Live Chat
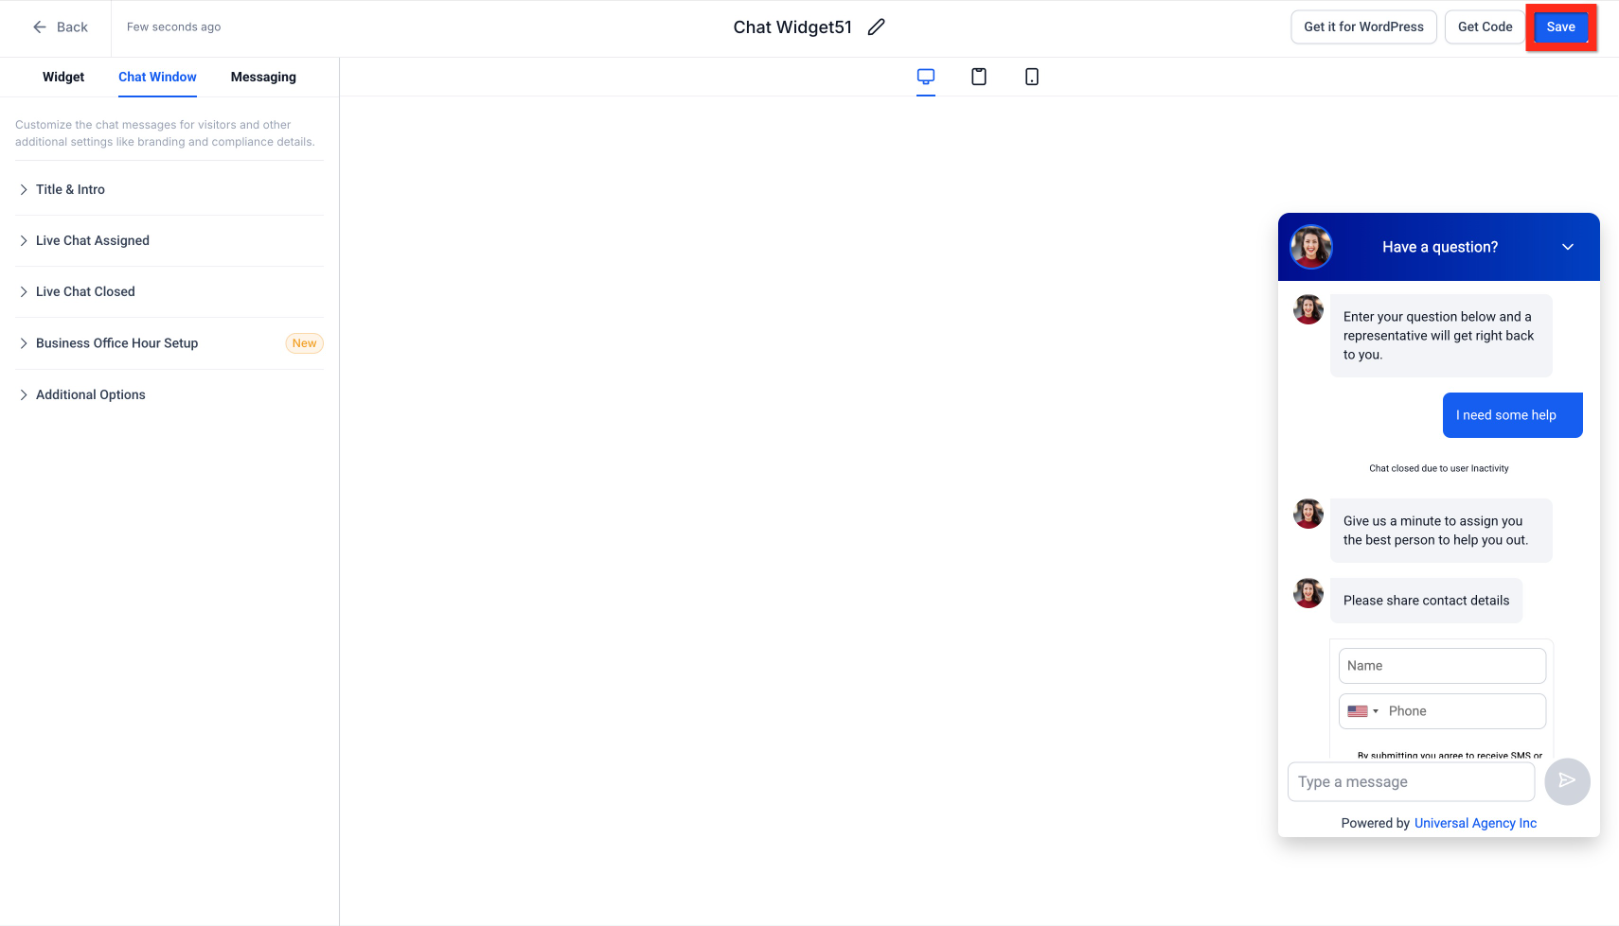
- Customize your widget to fit your brand
- Click Save
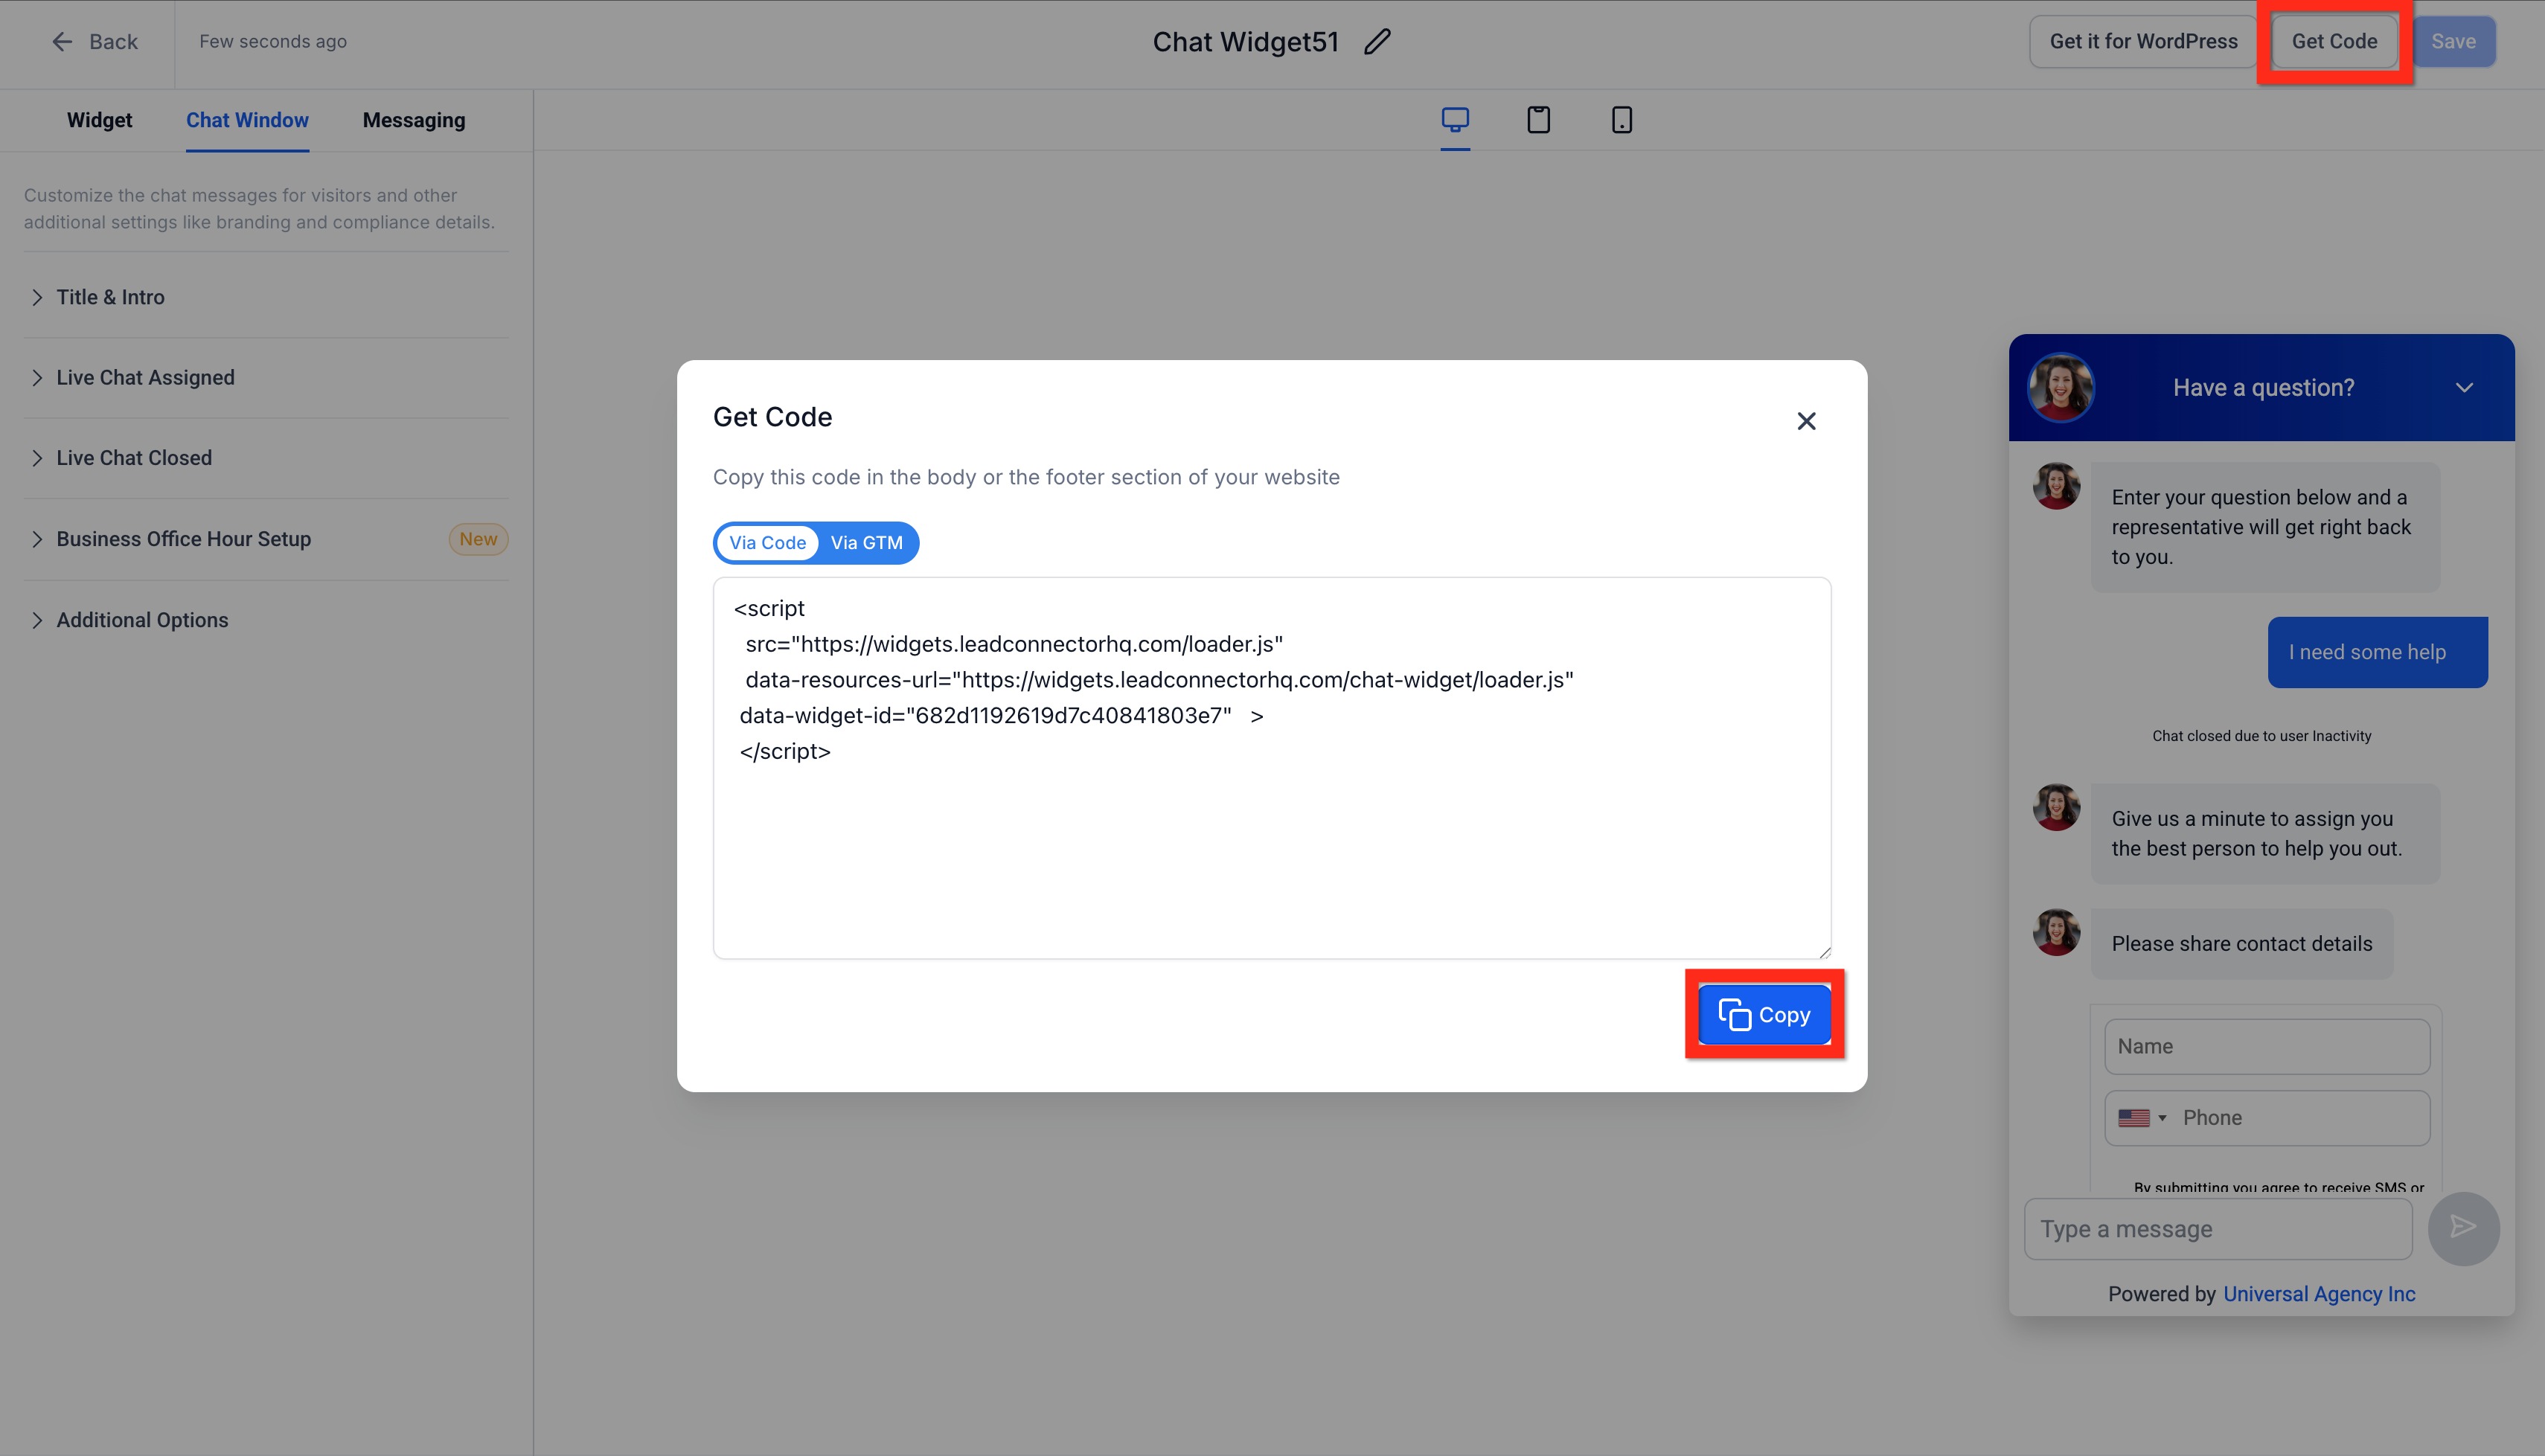
- Click Get Code > Copy
- Copy the provided embed code
Additional Guidance
See the Help Center for details on using the All-in-One Chat Widget.
Review instructions on how to add multiple chat widgets to the same website.
Learn more about setting up and managing Live Chat.
Explore the Getting Started guide for Chat Widgets.
Review the available customization options to adjust the look and feel of your Chat Widget.
Next, you can decide how you'd like to deploy your new widget! Let's explore your options.
Deploy Live Chat Widget via Embed Code
Already familiar with adding scripts directly into your website or funnel? Perfect! Embedding the chat widget directly into your site editor couldn't be simpler. Follow these quick steps:
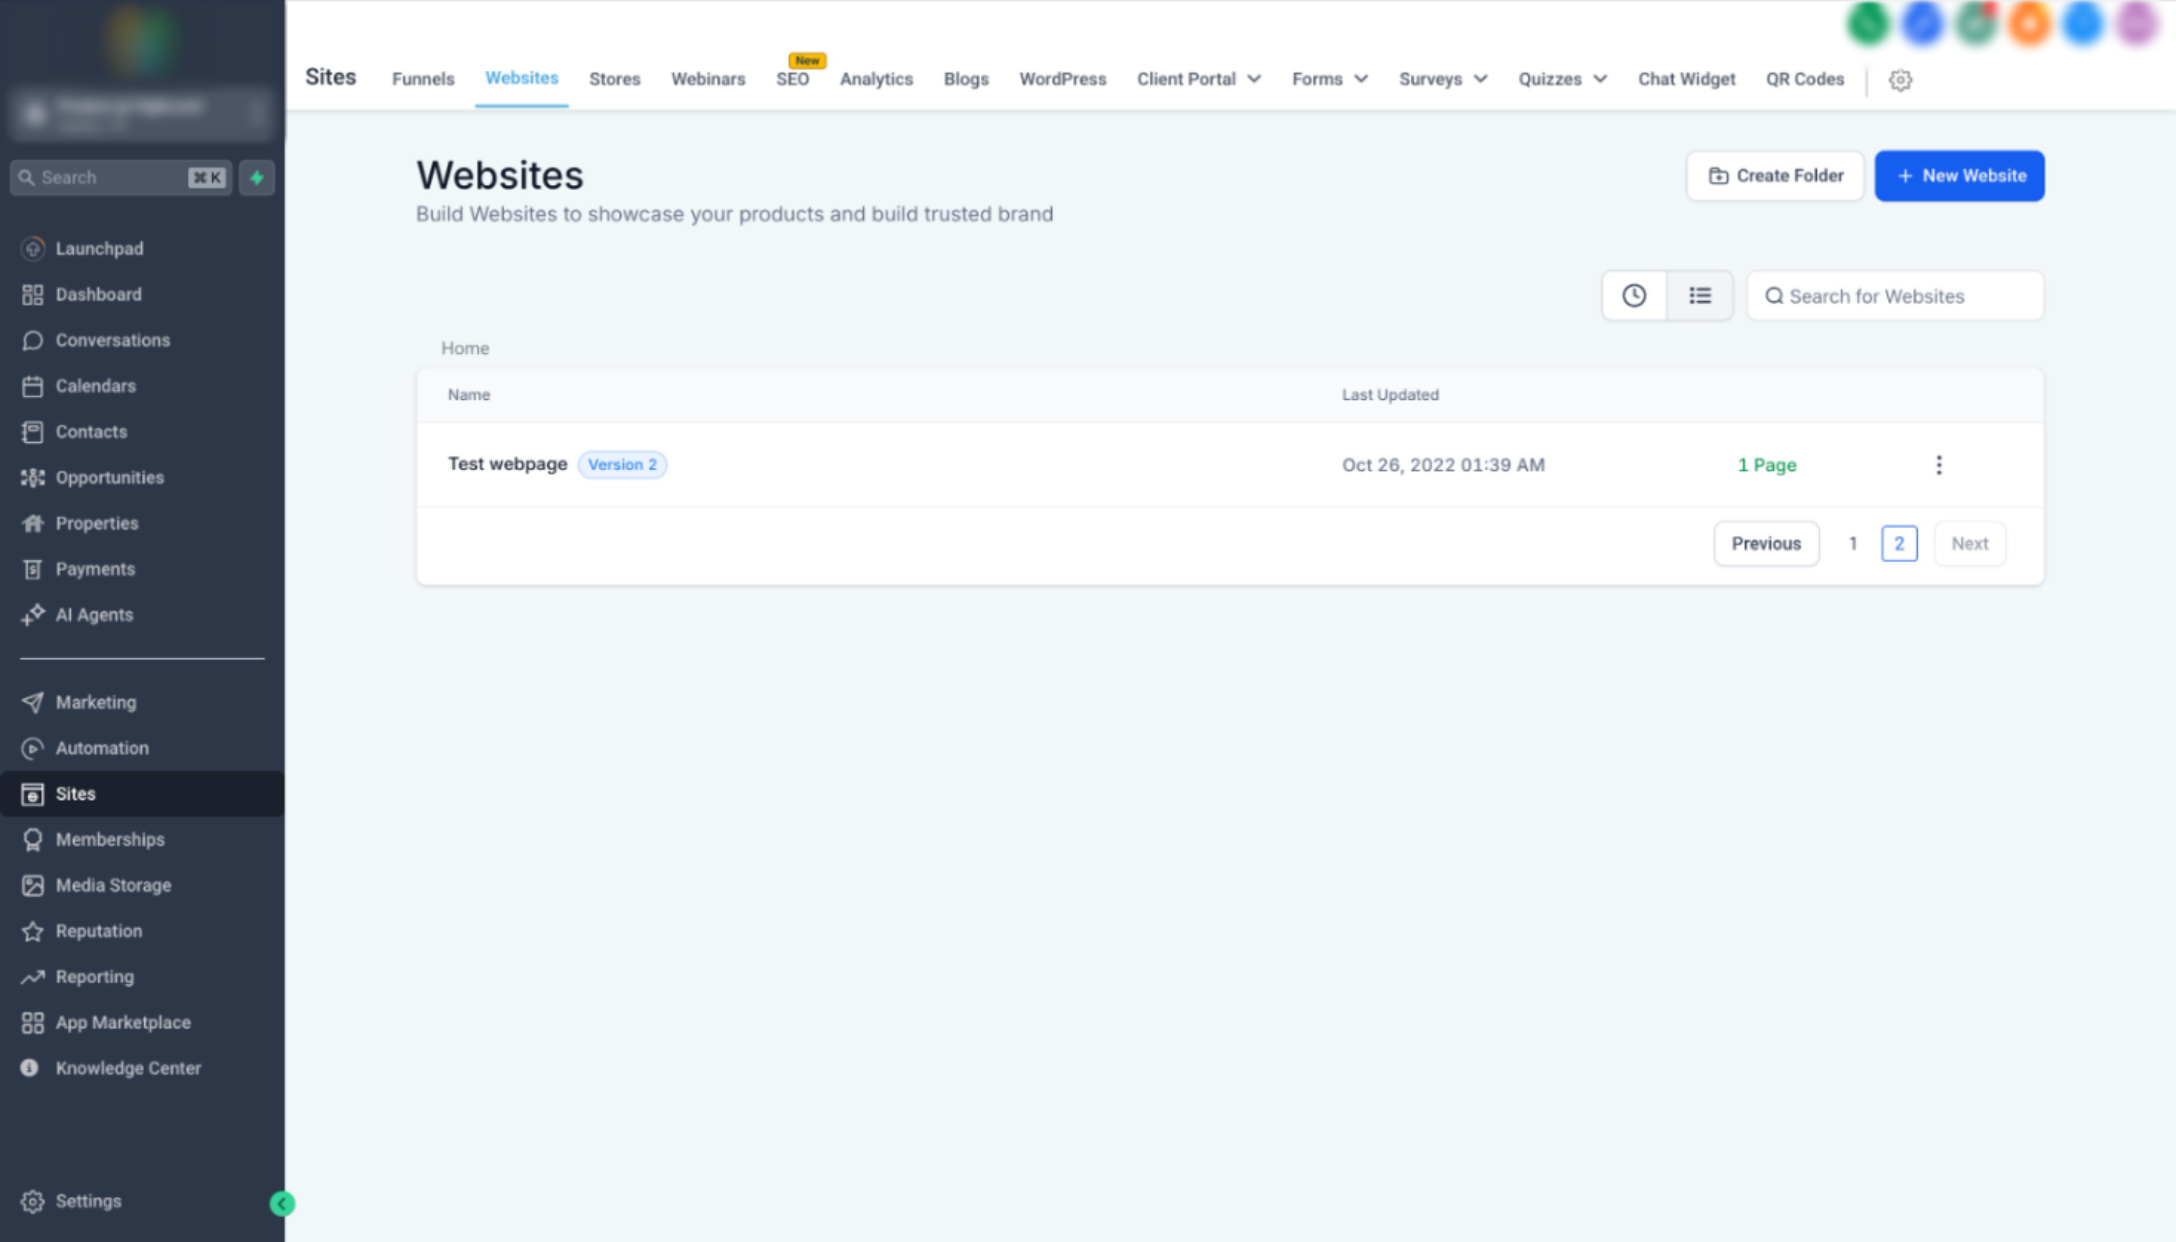
- Navigate to Sites > Websites OR Sites > Funnels
- Find your desired website or funnel and open it for editing
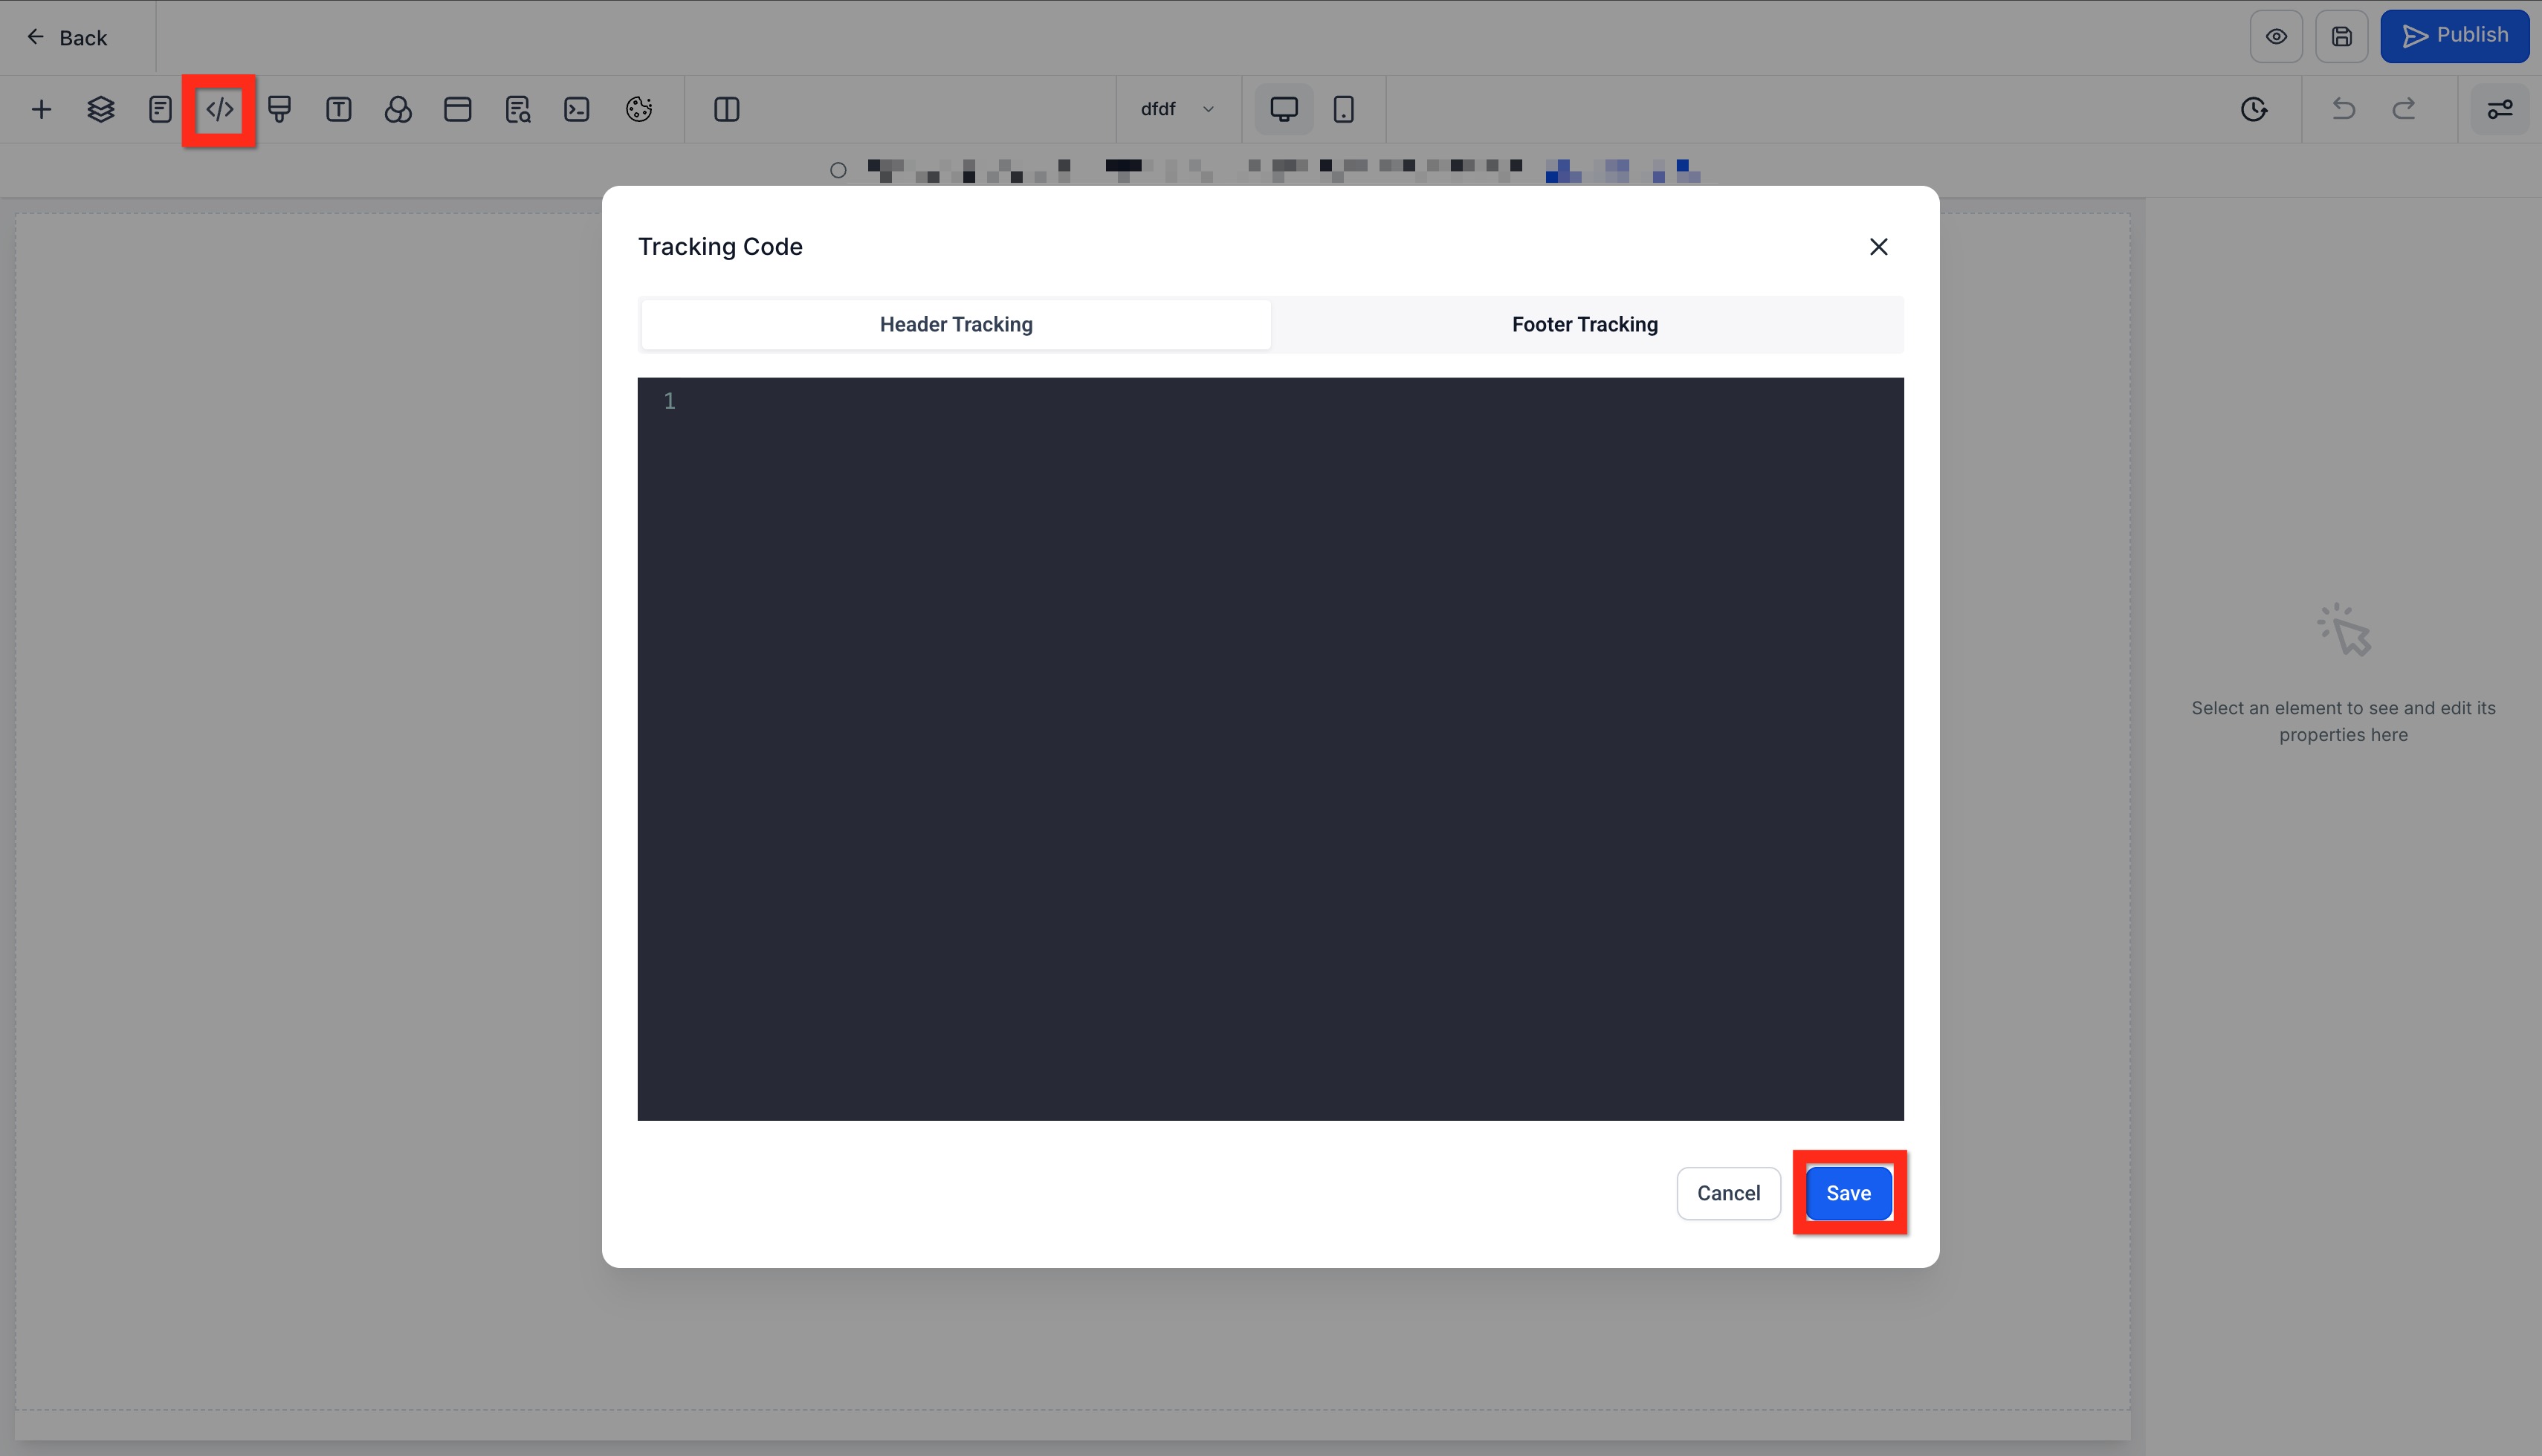
- In the editor, click the Tracking Code icon (
</>) - Paste the copied chat widget code
- Click Save
Additional Guidance
For step-by-step instructions on installation, see the Help Center article about installing the Chat Widget.
Great job! Next, you might consider testing your widget to ensure it's functioning seamlessly.
Deploy Live Chat Widget via Settings
Prefer to keep things even simpler? Deploying your widget directly through your website settings is super convenient, especially if you're less comfortable dealing directly with code. Let’s walk through it:
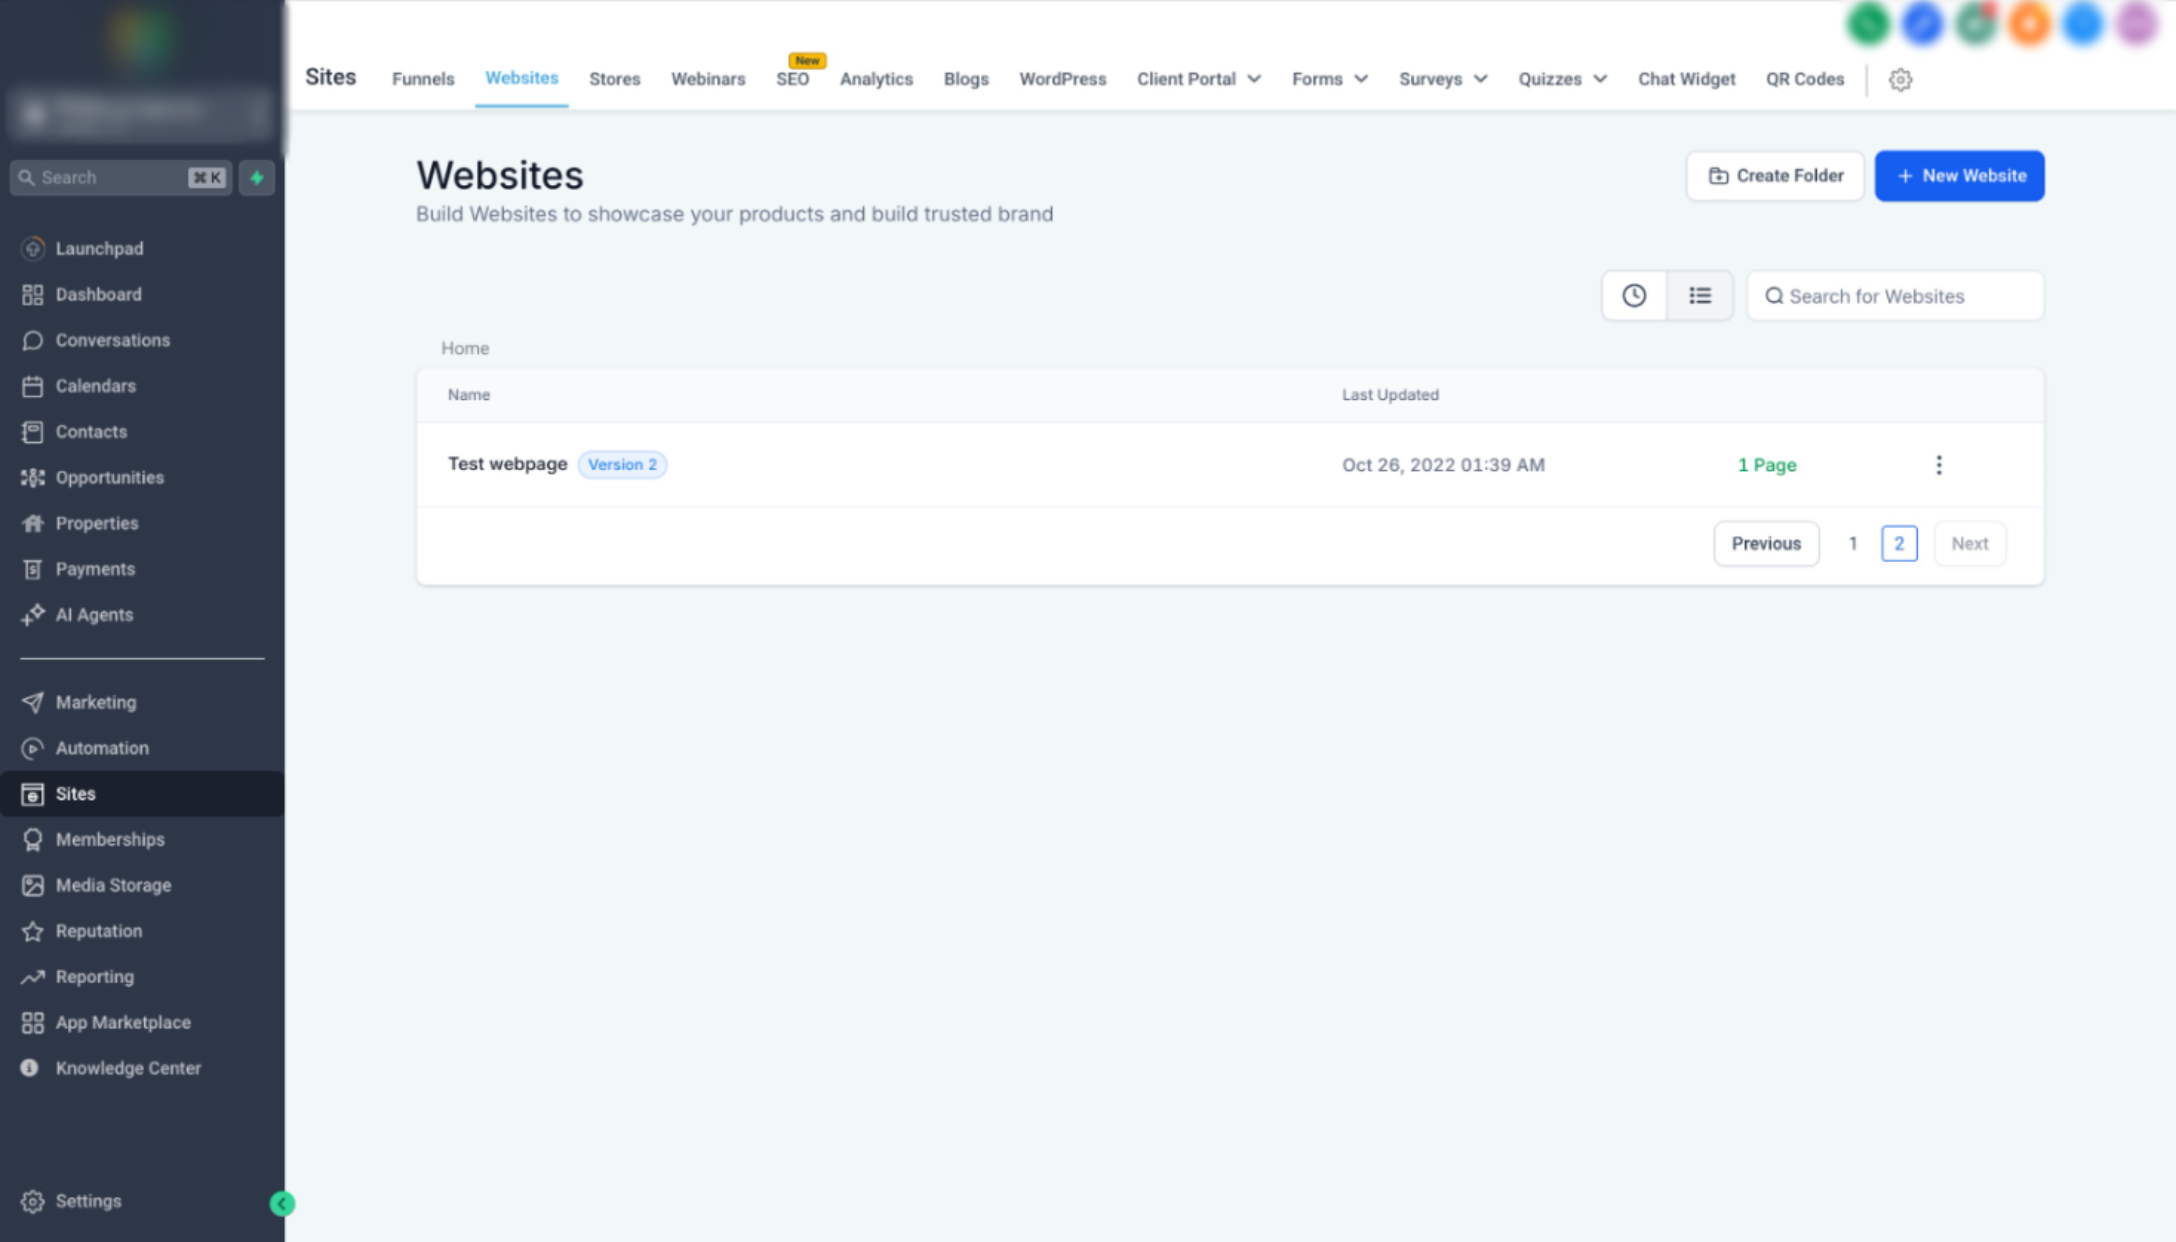
- Navigate to Sites > Websites OR Sites > Funnels
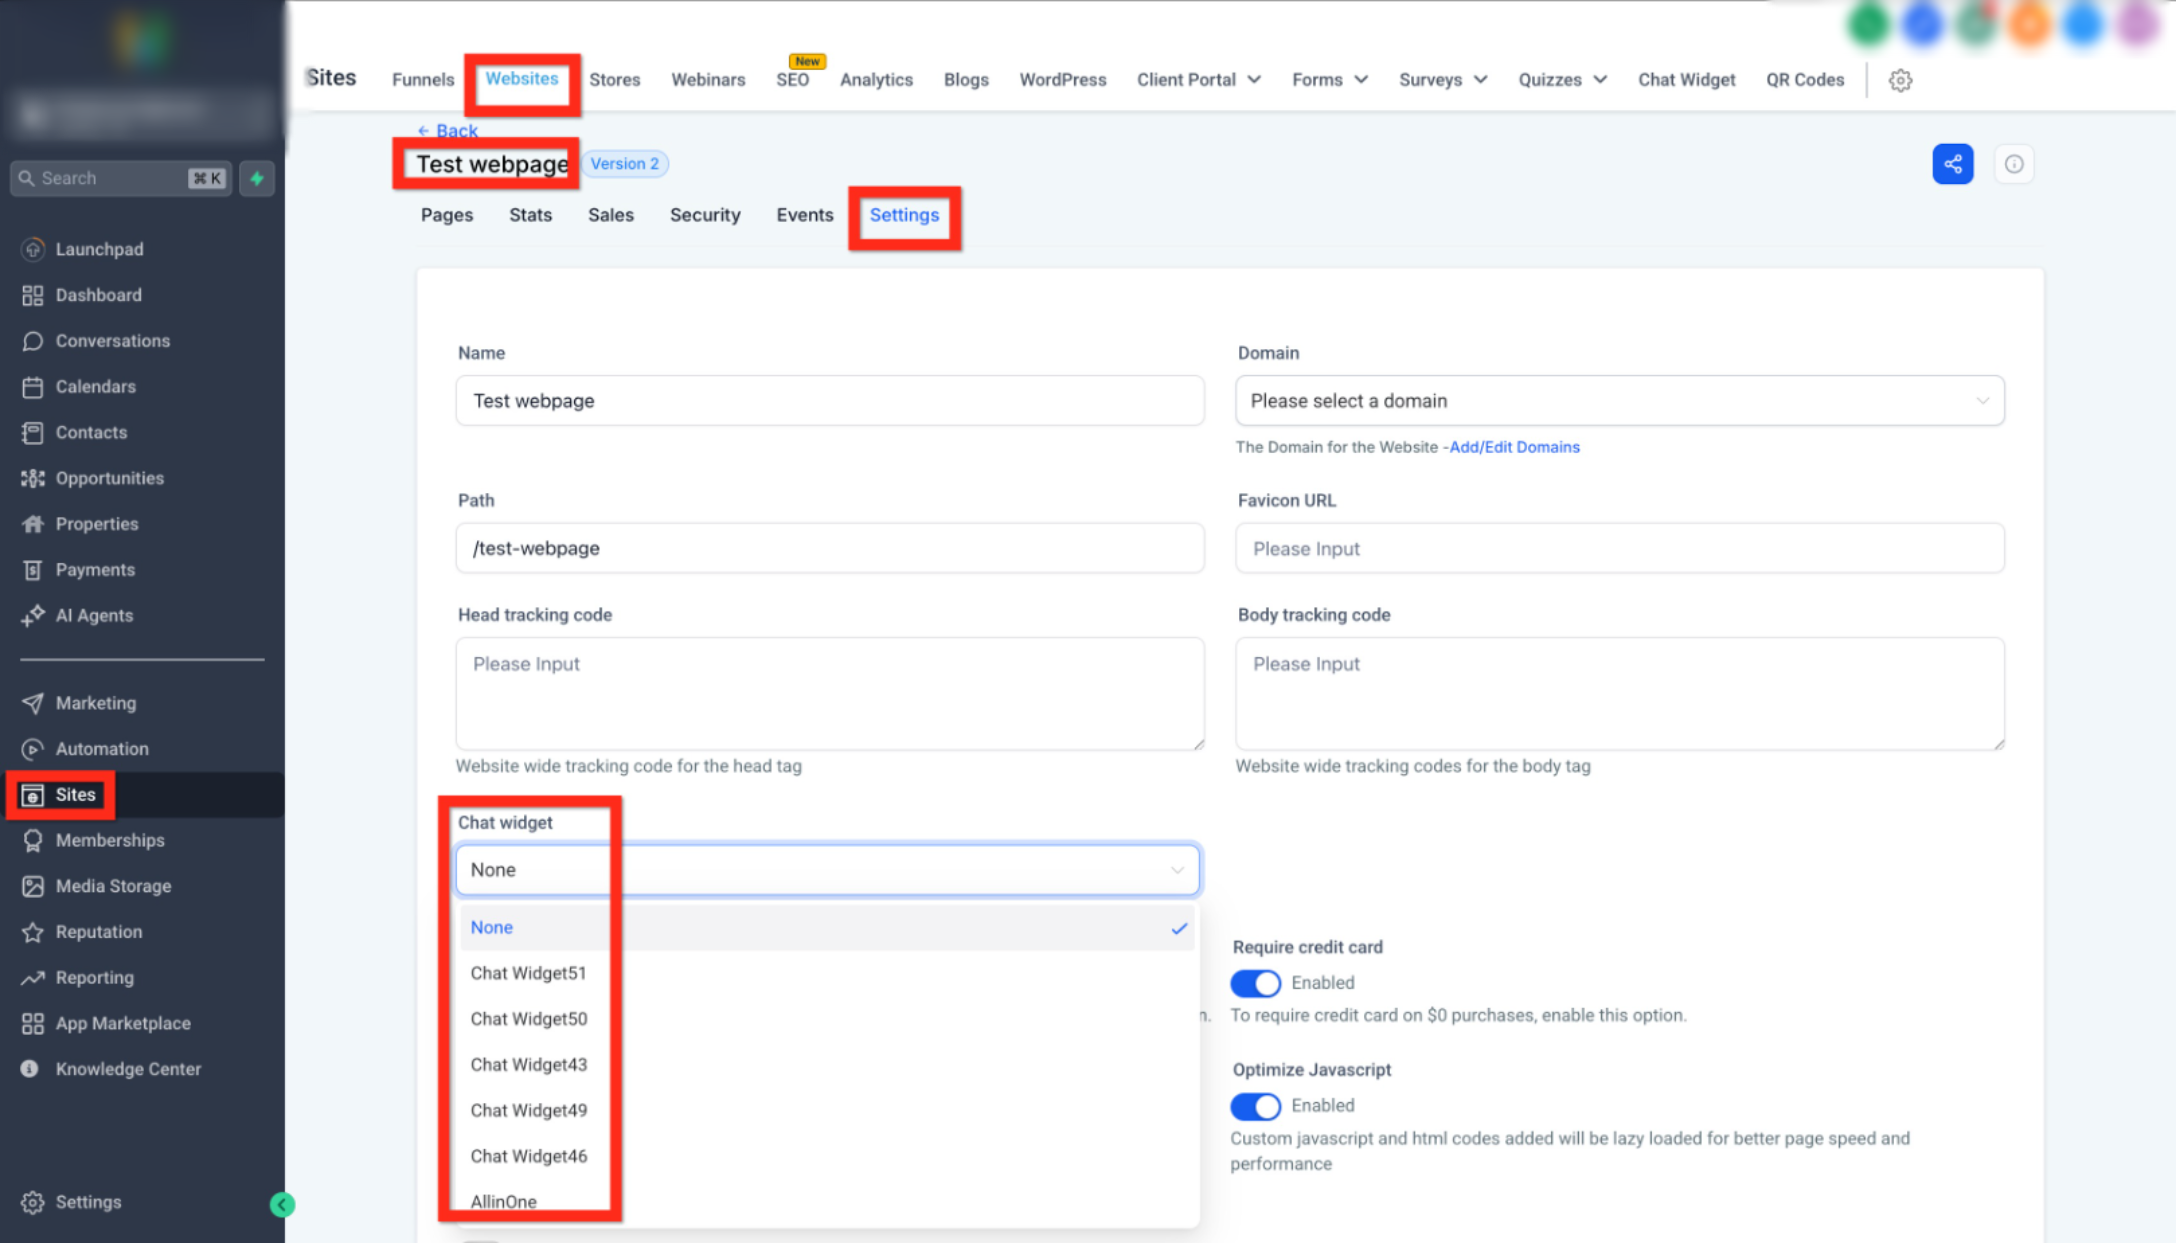
- Find your desired website or funnel and open its settings
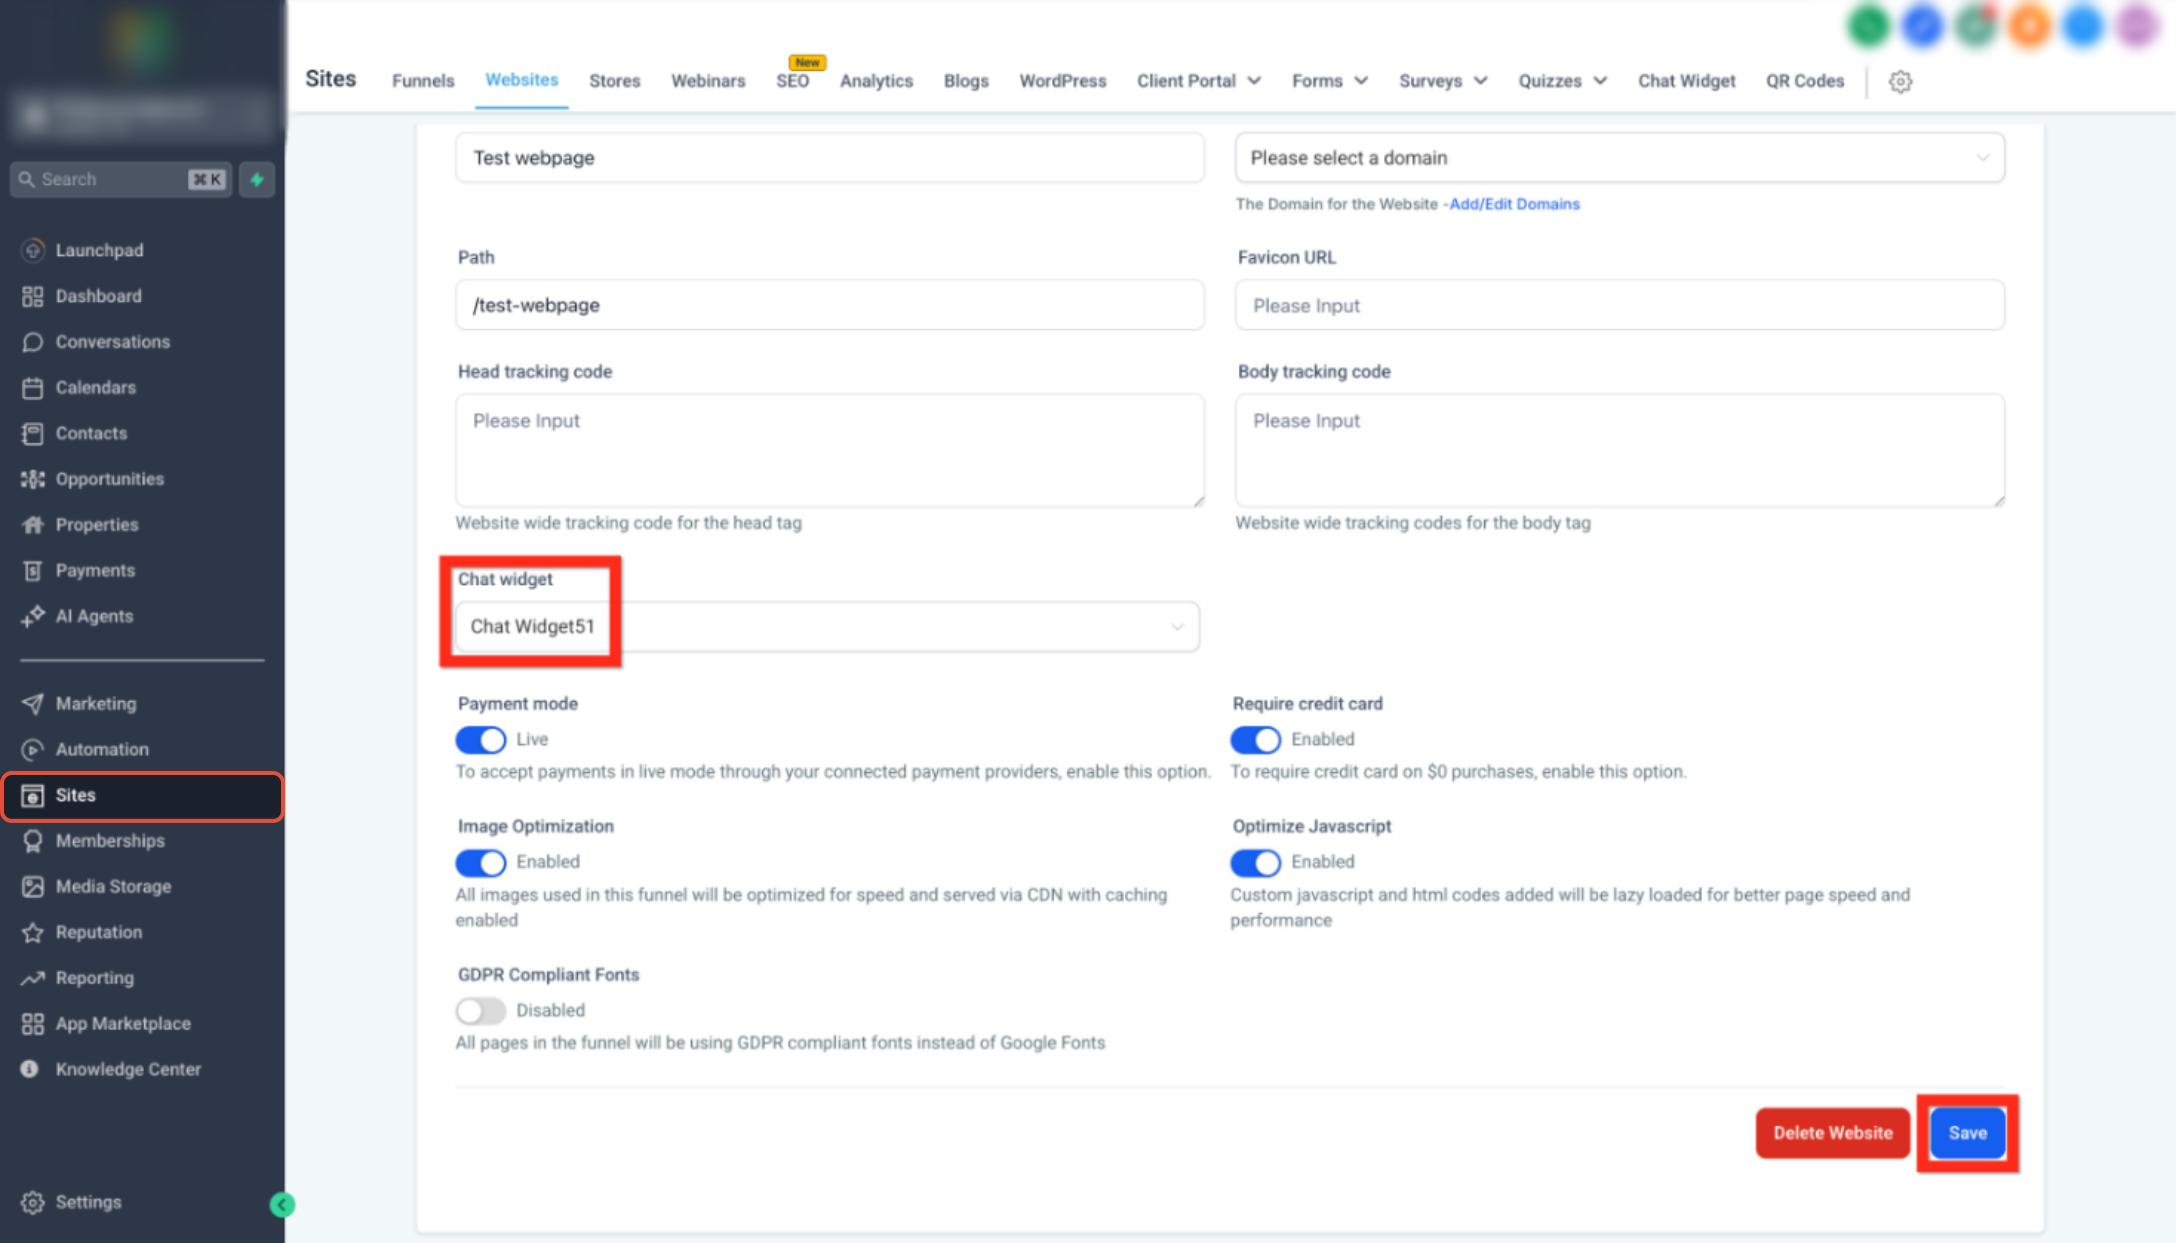
- Under the Chat Widget section, select your live chat widget
- Click Save
Fantastic! You're all set. Next, why not explore advanced customization options to really make the chat experience unique to your brand?
Need Help?
If the Live Chat Widget is not appearing or working as expected, first review the widget configuration and how it was added to the website or funnel.
Verify that:
- The Live Chat Widget was saved after customization.
- You are working with the correct website or funnel.
- The correct widget is selected in the website or funnel settings.
- If using embed code, the latest widget code was copied and added to the correct tracking or custom code area.
- The embed code was saved after being added.
- The website or funnel changes were published.
- The widget code was not accidentally added more than once.
- Another chat widget is not conflicting with the widget you are testing.
- Browser extensions, ad blockers, or privacy tools are not blocking the widget.
- You have tested the published page in a private or incognito browser window.
- The page has been refreshed after clearing cached content if recent changes are not appearing.
If the widget appears but visitors cannot start or continue a conversation, confirm that the Live Chat option is enabled and that the widget is configured for the intended communication method.
If the issue continues, collect the affected website or funnel URL, widget name, deployment method used, browser and device, expected behavior, and screenshots of the widget settings and code placement before contacting support.